How to Add Options to Products on your Website
- Do you sell T-shirts in four different sizes and colors? Does your spa service offer standard or luxury packages? Product options allow you to add variations to a product, saving you time and making it easier for your customers to find what they want.
- To add options to a product, click on the product in Store > Product Library > Products. Scroll down to the Product Options section, then click Add Options.
- For example, let's say you're selling a T-shirt and it comes in two colors: red and blue. Let's also imagine that it is available in four sizes: S, M, L and XL.
1. To get started, select the option type. This will determine how your customers make their selection on the product page. This can be a drop-down list, buttons or colored tiles. Do you want to give your customers the opportunity to personalize the product? Click on the product modifiers to find out how.
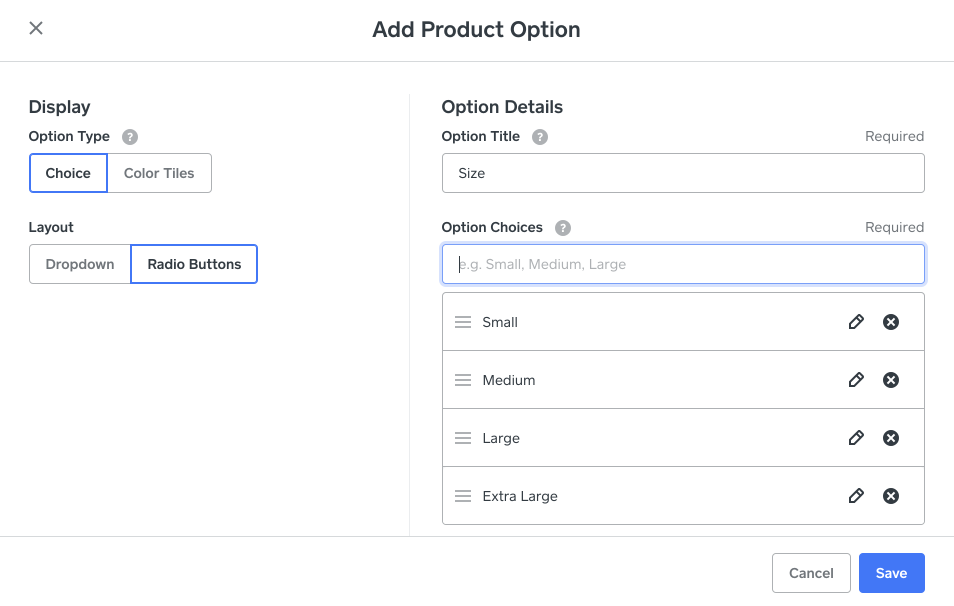
2. In this example, we'll use buttons to create size options. On the right, enter the name of the option (here, the size) and the different sizes available in the Choice of options field. You can separate each word with a comma, or simply press the tab or enter key. Options will appear in this field as you type them.
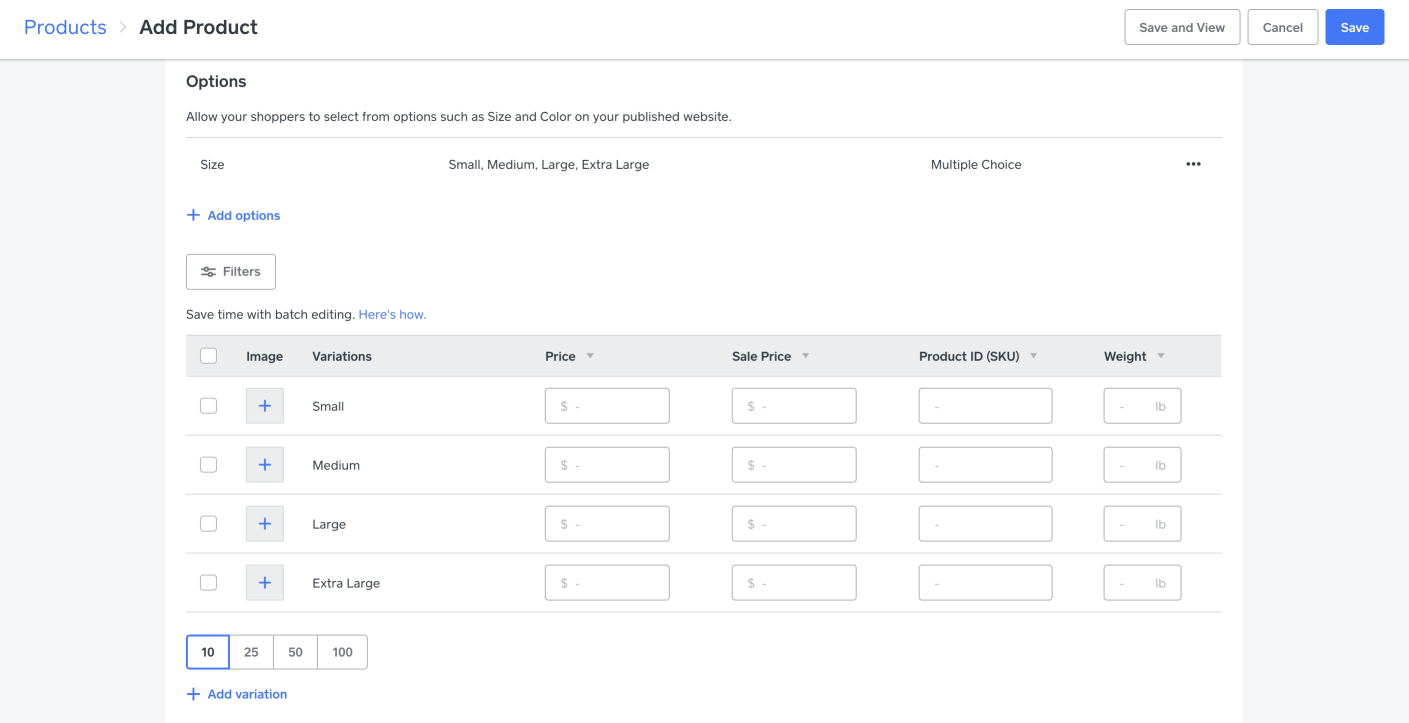
3. When you're finished, click Save to return to the main product screen. The options you just created should appear in a list. You can provide a price, product ID/SKU, and weight for each option. If you choose not to customize these fields, the information entered in the main Add Product box will be used for all options. Don't forget to change the weight of the products if it varies and you are shipping them!
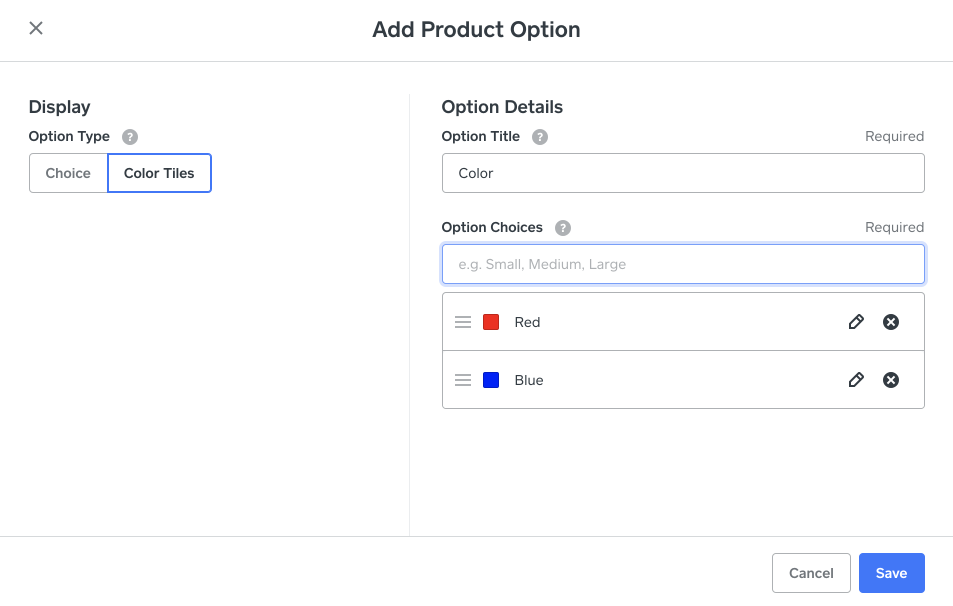
4. To add colors, click the Add Options link and repeat the same process as for sizes. You can use the Color Tiles choice and enter the name of each color in the Choice of Options field, which will display a premade swatch for each color name for buyers to click on. You can also use the drop-down menu or buttons if you prefer. When you're finished, click Save.
5. You can add an image for each of the options by clicking on the + boxes in the Image column and uploading the desired image. You can also choose from images you have already uploaded for your product. When customers select an option on your website, the image that accompanies that option will also be displayed.
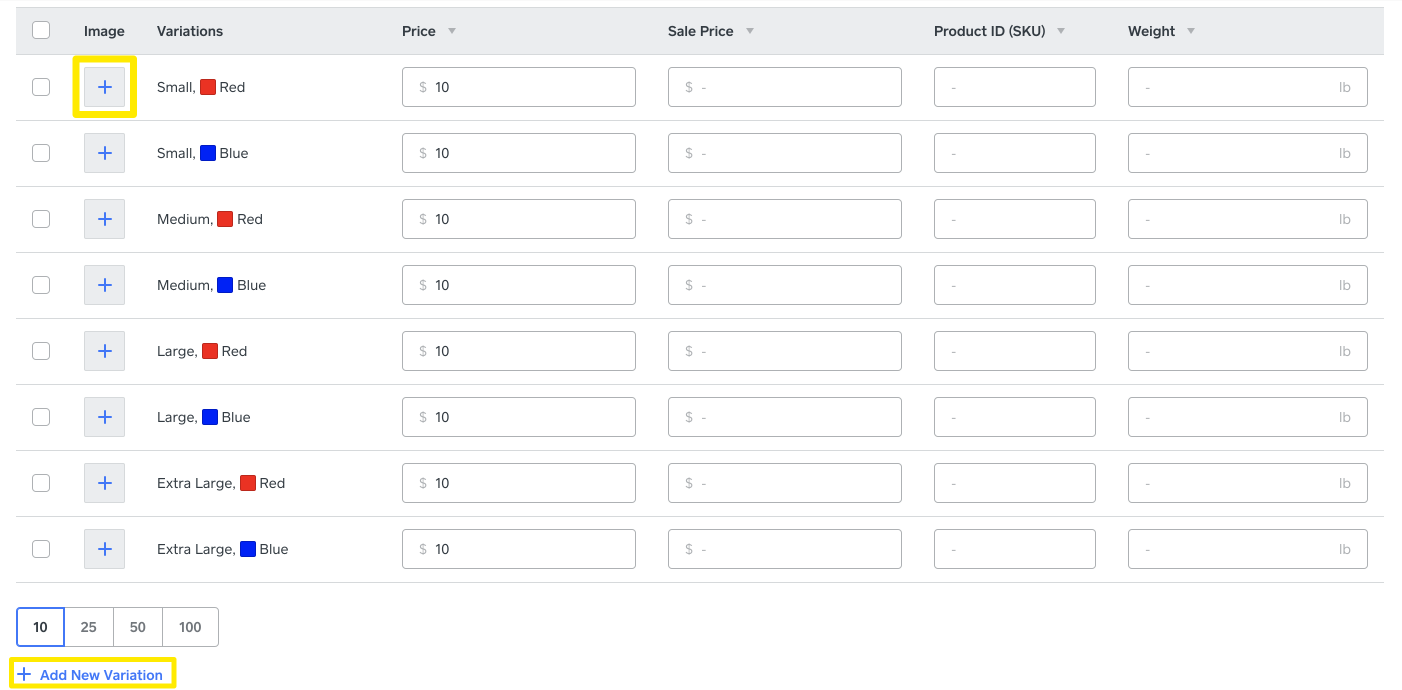
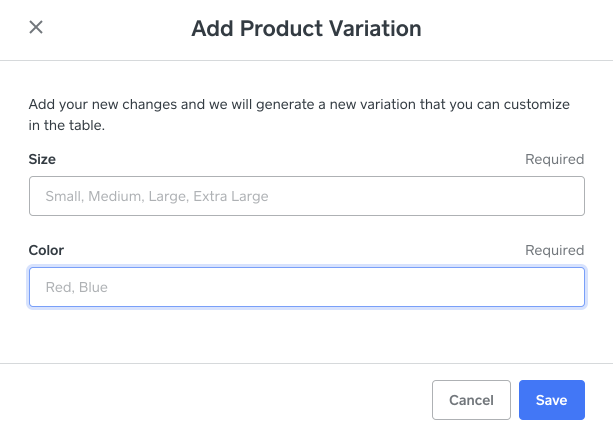
6. If you need to add other sizes or colors for this product, simply click the + Add variation link at the bottom left and enter the information. If you are adding a new option type, use the Add Options link and follow the same process as adding sizes and colors.
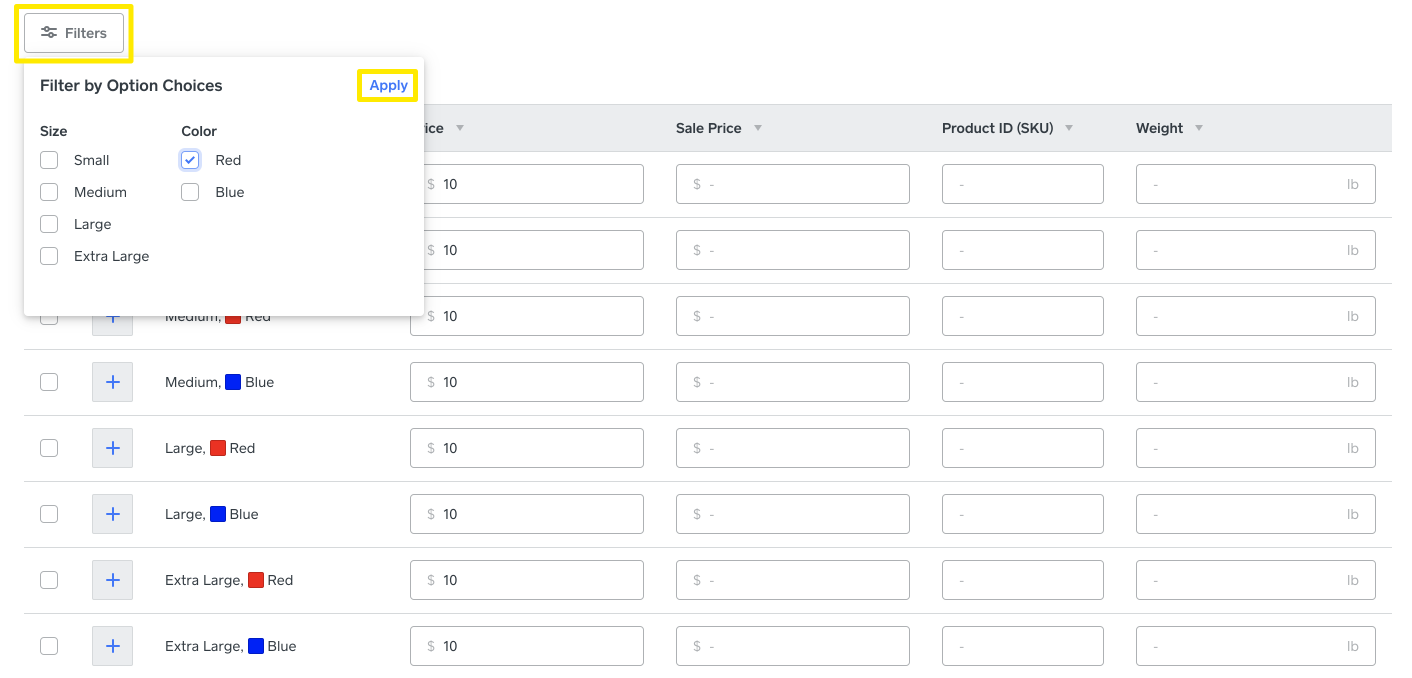
7. Once you've created your options, you can go back and change them at any time. You can also filter the list to only show certain options, for example if you have sold all your red T-shirts and want to change the inventory for those options. This option is particularly useful if you are selling a product with a large number of options. If you select multiple options at once, you can edit them in batches by clicking on one of the following fields: price, sales price, or weight