How to Add a Digital Product on your Website
Digital Items (files, music, videos, or anything your customers can download) are added in much the same way as physical items.
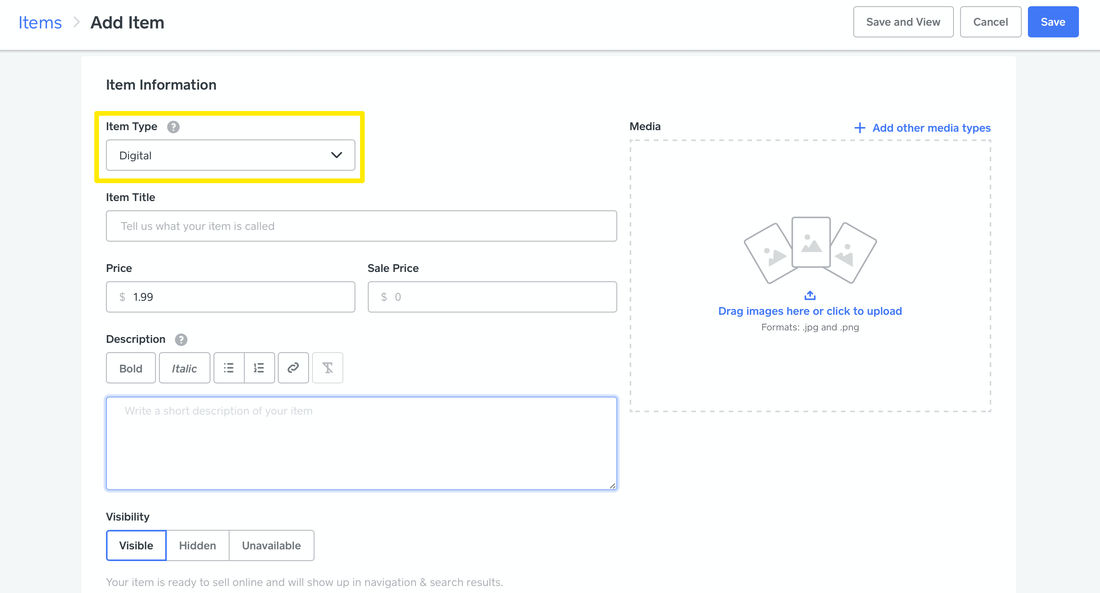
1. To add a digital item go to Item Library > Items on your dashboard and click Add Item. Use the Item Type menu to select Digital, then fill in the title, description, and price fields and add an image if you like.
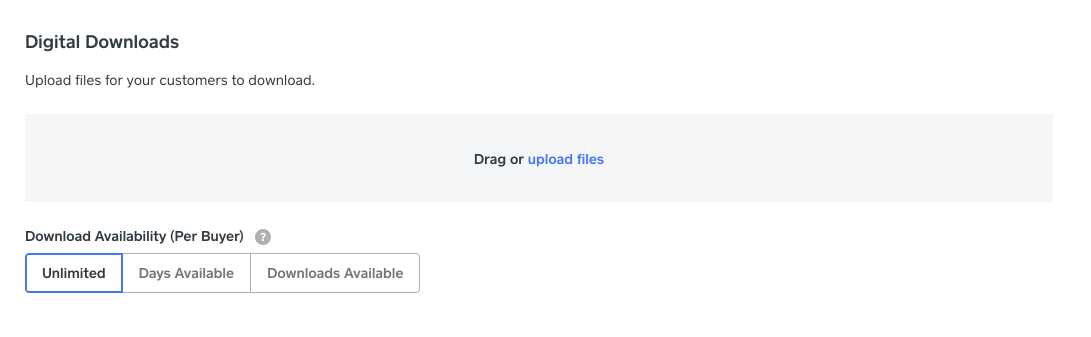
2. To upload the file or files that your customers will download, scroll down and click Upload Files. You can add multiple files, though each file must be 3 GB or less in size. You can also limit the customer’s ability to download the file multiple times by either setting a maximum number of downloads per customer, or making the file available to them for only a limited number of days. The default setting is Unlimited, which means they can download the file as many times as they want at any point in time.
3. What if you only want to sell to customers living in your area? You can restrict purchases of these items to only the locations you’ve set up for shipping. It’s okay if you’re not actually selling any items that need to be shipped - these settings are also used to control who is allowed to purchase digital items, event tickets, memberships, and services from your website. Once you’ve set up which areas you will sell to, go to Settings > Shipping > Advanced Settings and click edit. Use the checkboxes here to allow or disallow purchases from anywhere in the world.
- When your customer purchases a digital item, they'll be able to download that item the moment they check out via the link on their order confirmation page. They’ll also receive an email that includes the download link. You’ll receive a copy of the same email, giving you a backup of the link that you can send in case the customer misplaces their email.
- Note: Due to the different delivery methods for these items, they must be purchased separately from items that can be shipped or picked up in person.